Welcome to the CTDA Quick Start Guide. This guide will outline the basic steps you need to know to start putting your collections into the CTDA. For more detailed information about specific parts of the CTDA, please see the Working with Content Models and Managing Objects in the Repository guides.
| Anchor | ||||
|---|---|---|---|---|
|
| Panel | ||||||||||||||
|---|---|---|---|---|---|---|---|---|---|---|---|---|---|---|
| ||||||||||||||
|
| Info |
|---|
If you have any questions during this process, please email ctda@uconn.edu. |
| Anchor | ||||
|---|---|---|---|---|
|
Logging Into the CTDA Management Site
1. Enter https://manage.ctdigitalarchive.org into your address bar.
2. Log in with your username and password.
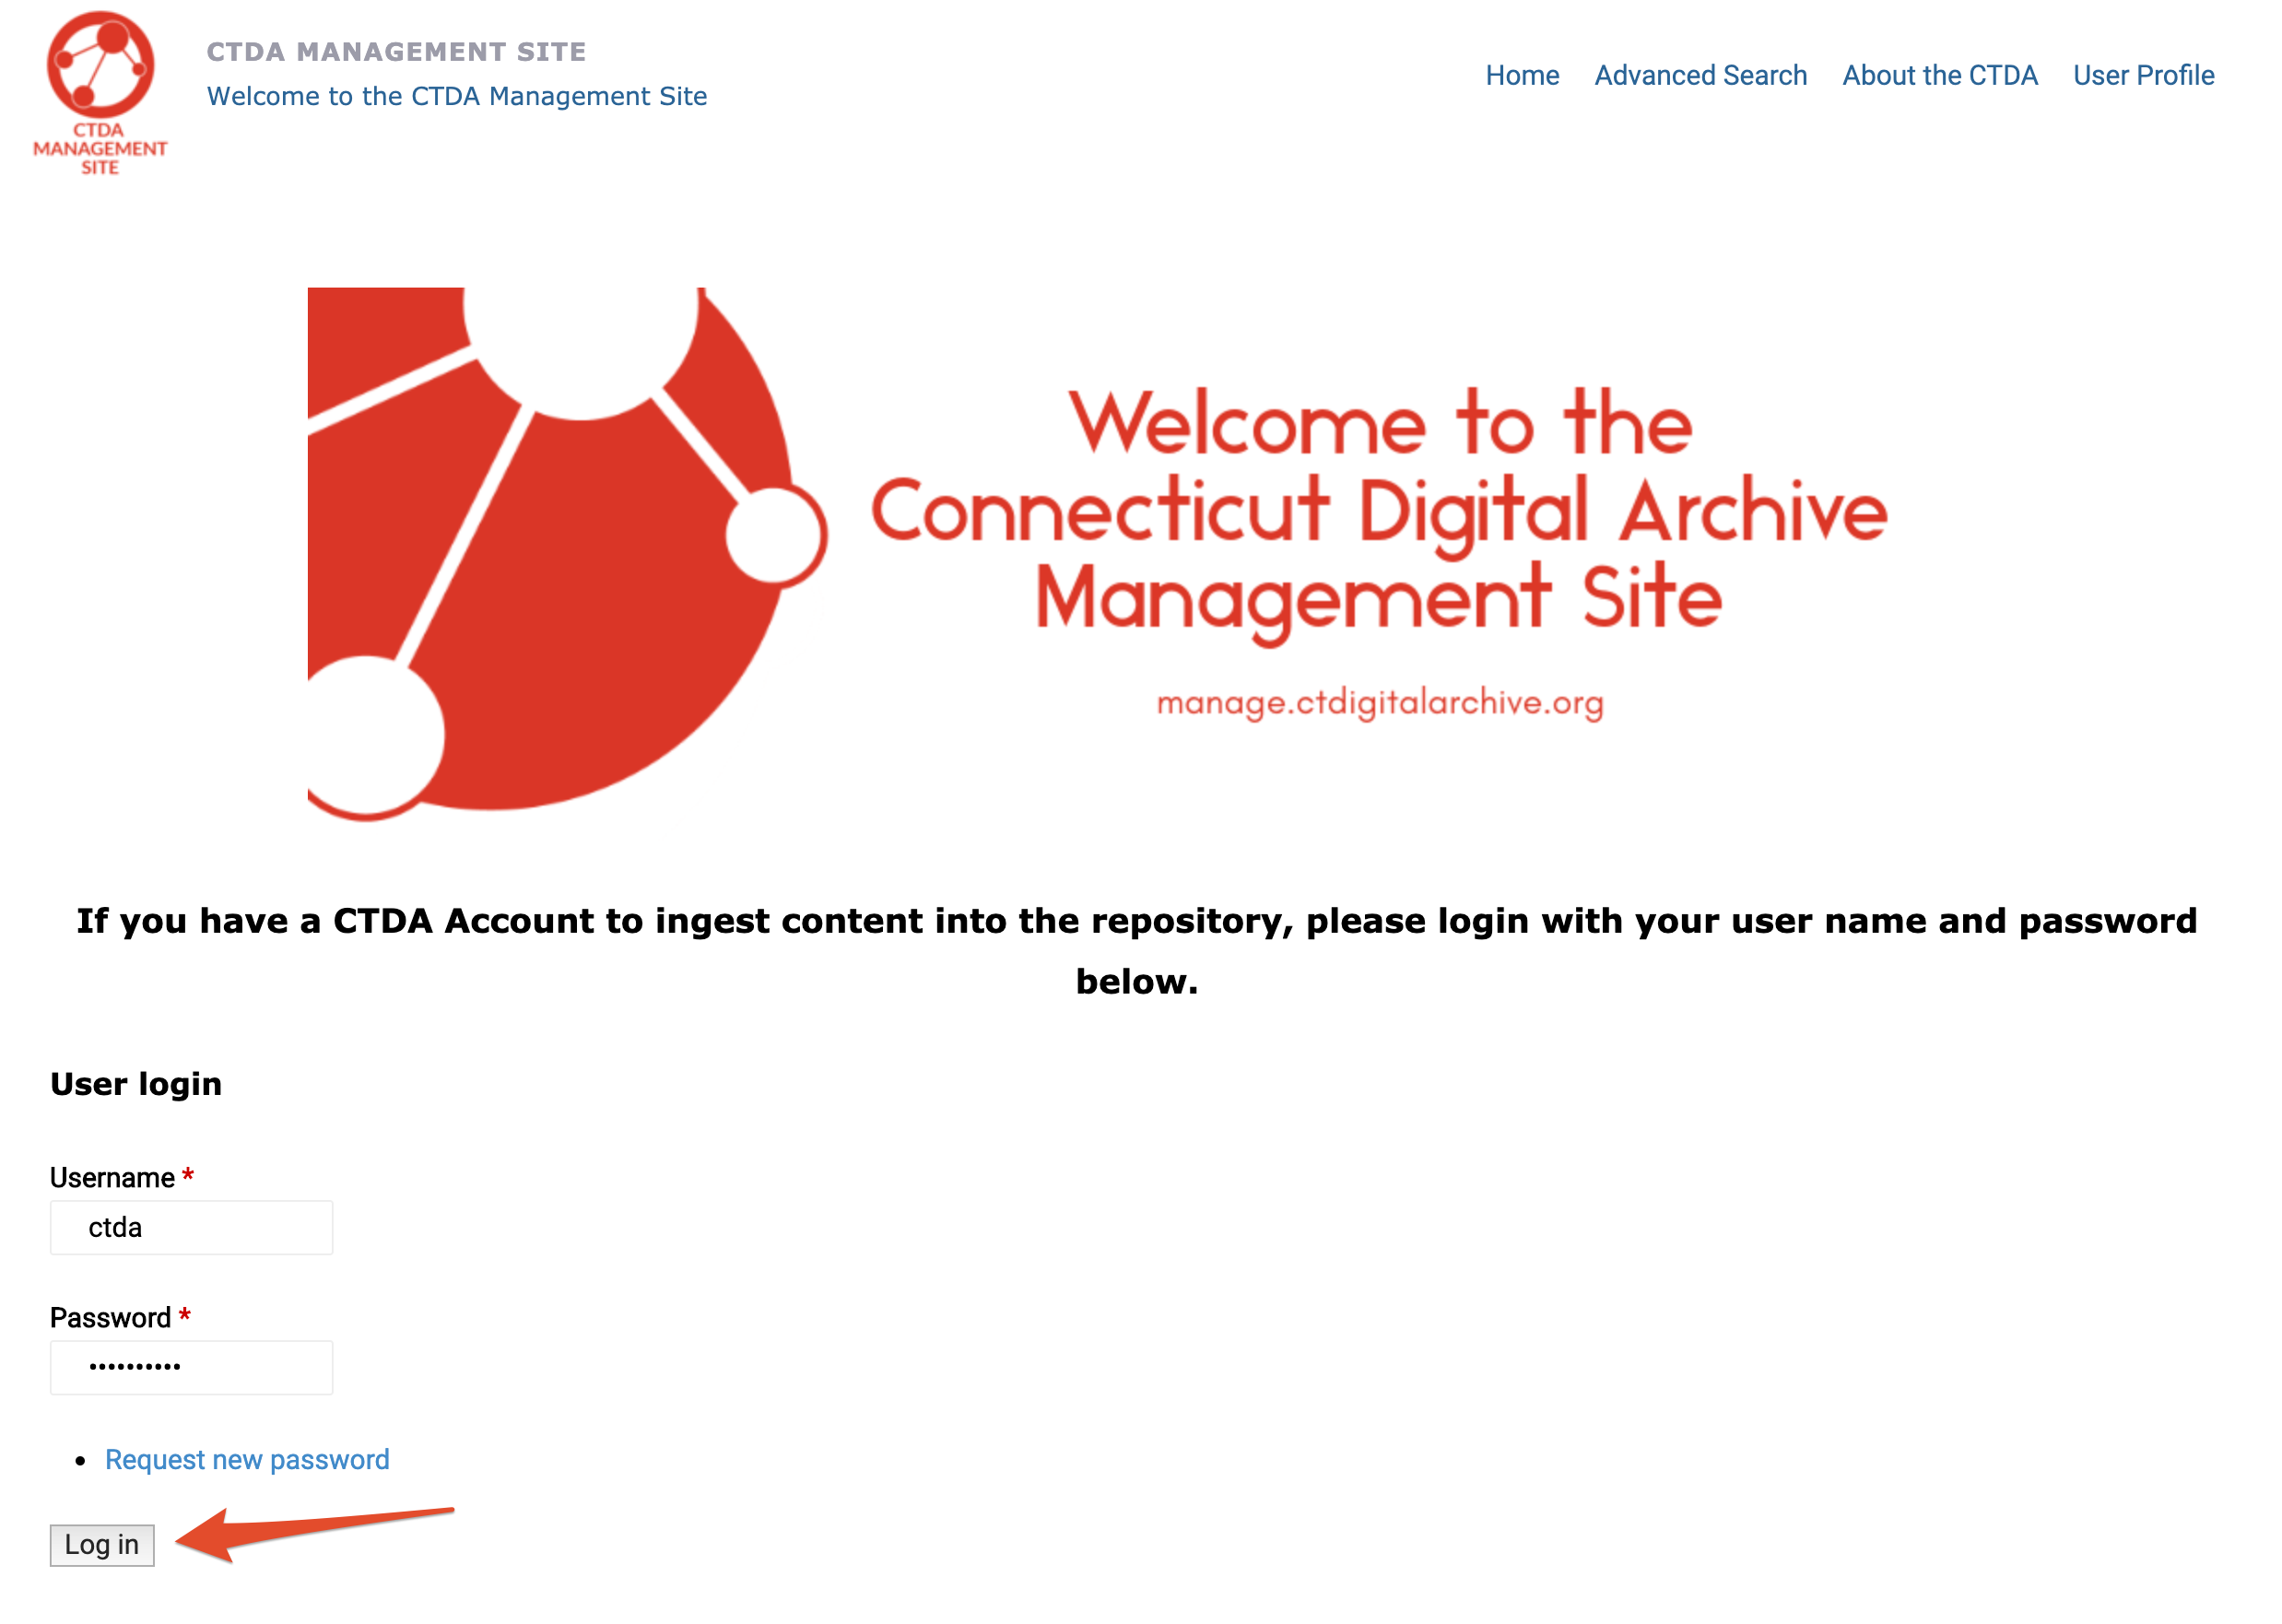

3. You will be automatically redirected to your institution's collection page.
| Info |
|---|
If you are not automatically redirected, please contact ctda@uconn.edu for assistance. |
| Anchor | ||||
|---|---|---|---|---|
|
Updating Your Profile
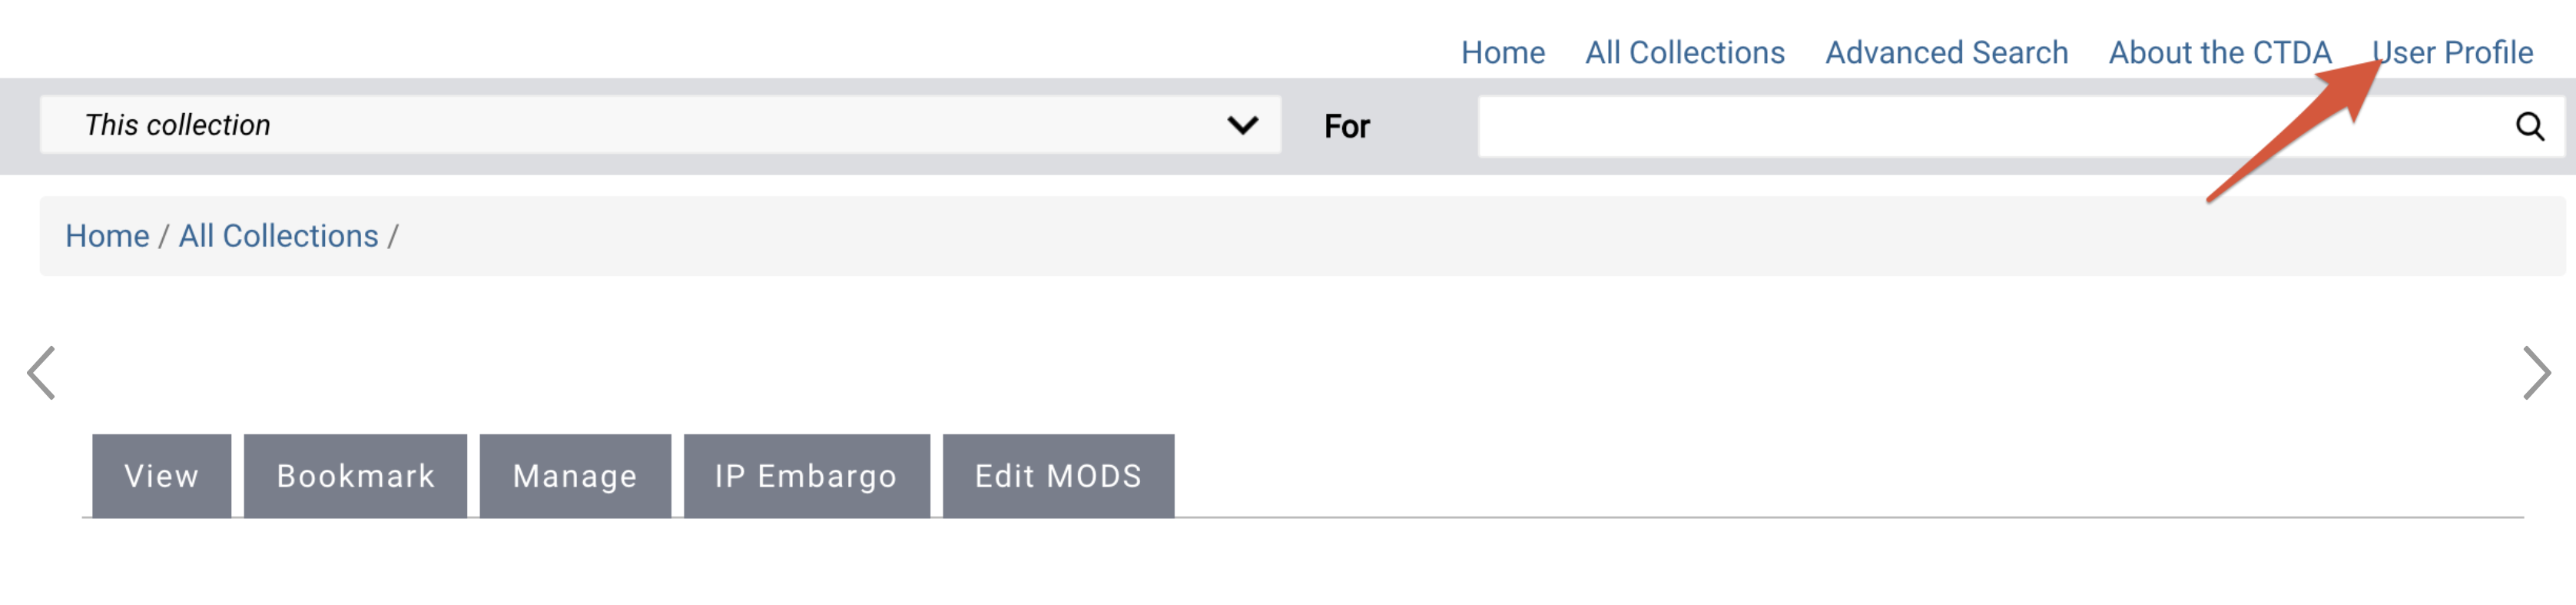
1. Click the "User Profile" link.

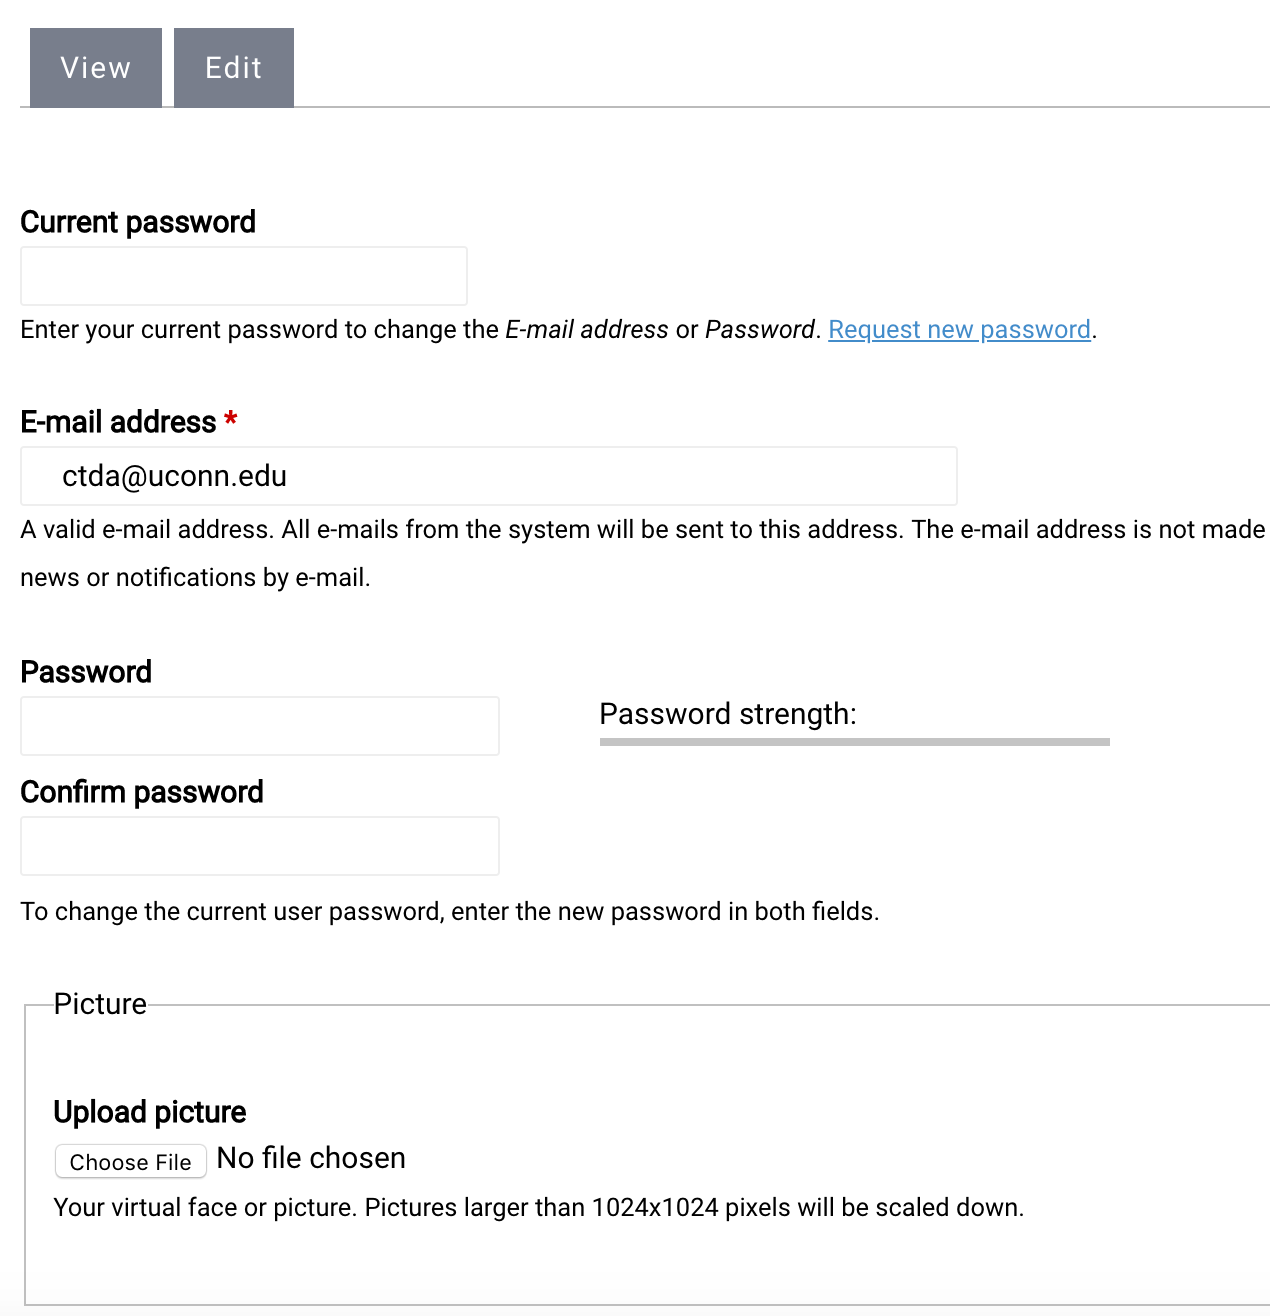
2. Click the "Edit" tab.

3. On the edit page, you can update your password, email, timezone, and more.
Creating Your First Collection
1. Login to manage.ctdigitalarchive.org.
2. When you log in, you will be redirected to your institution's collection page.
Info If you are not automatically redirected, please contact ctda@uconn.edu for assistance.
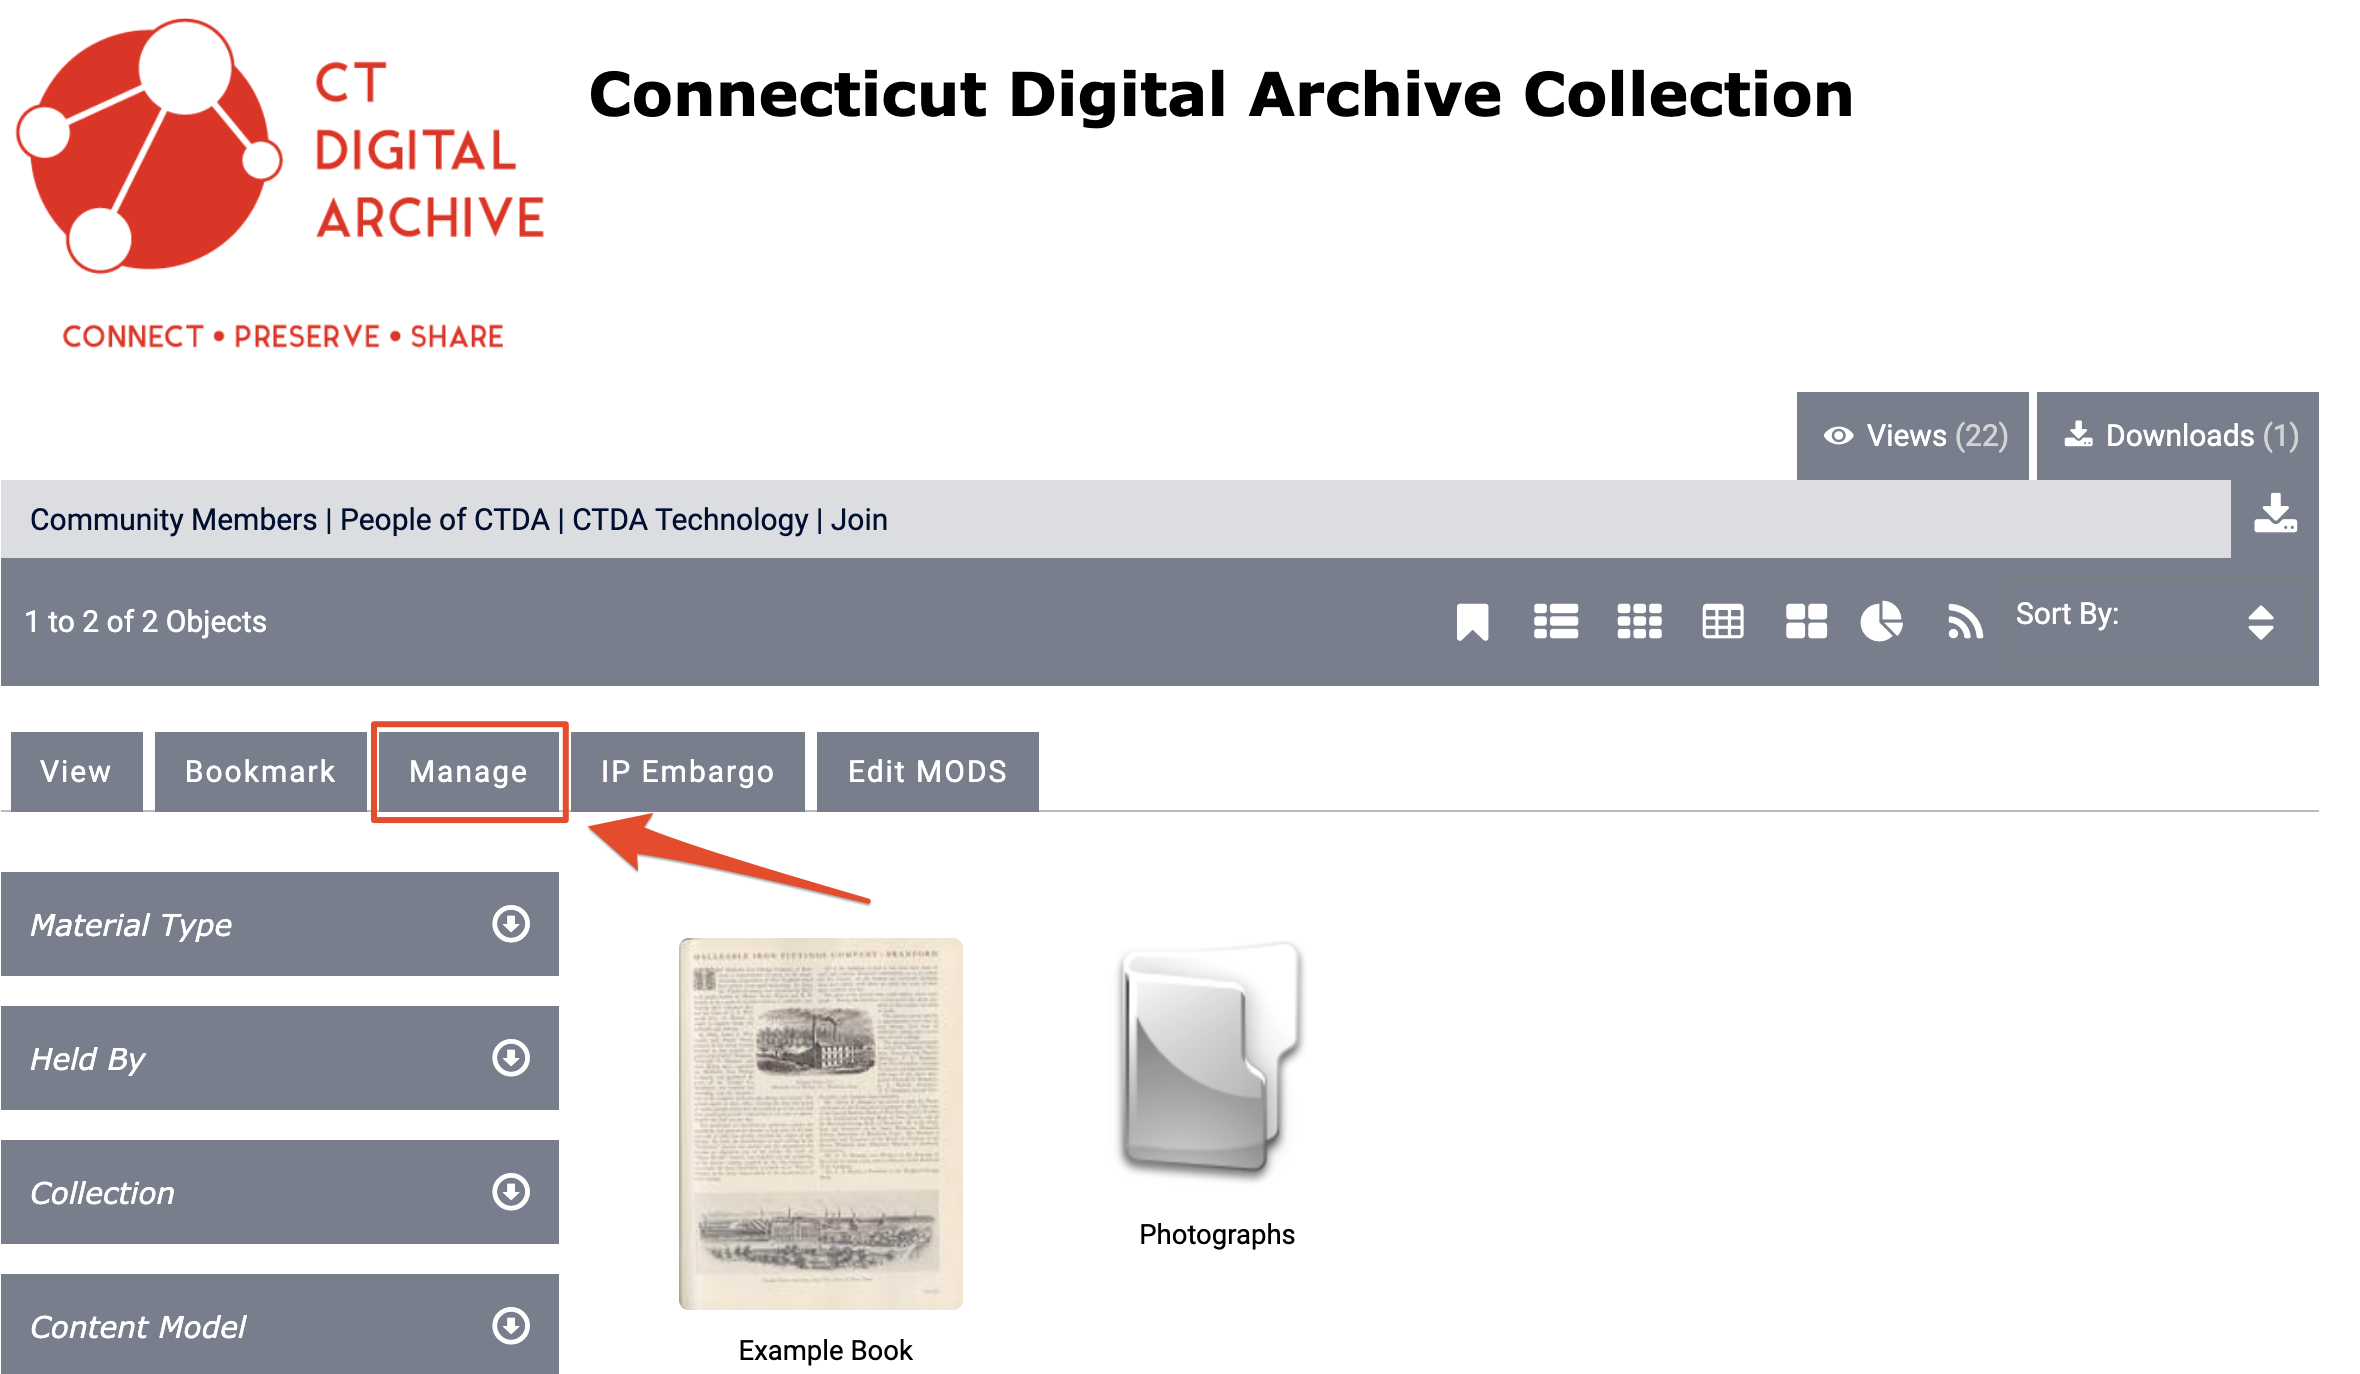
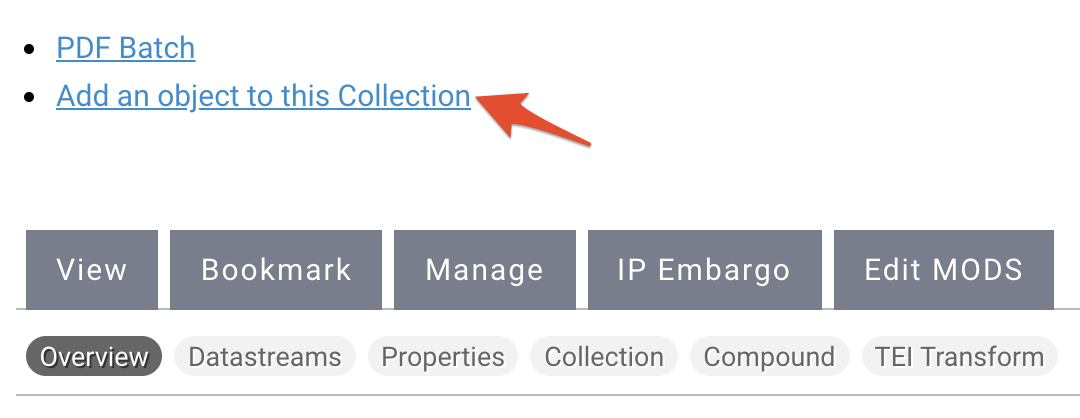
3. Click the "Manage" tab.
4. Click "Add an object to this collection".
5. From the dropdown, select "Islandora Collection Content Model" and click "Next".

6. The next page will be where you will set up your collection policy. Create a PID for your collection by entering your namespace number followed by a colon ( : ) and an identifier. For example, a PID for UConn Archives and Special Collections would start with 20002 and be followed by the name or number of the collection. The UConn Activism Collection object has the PID of 20002:Activism. When creating a PID, make sure you do not put in any spaces. The system will reject PIDs that contain any spaces.
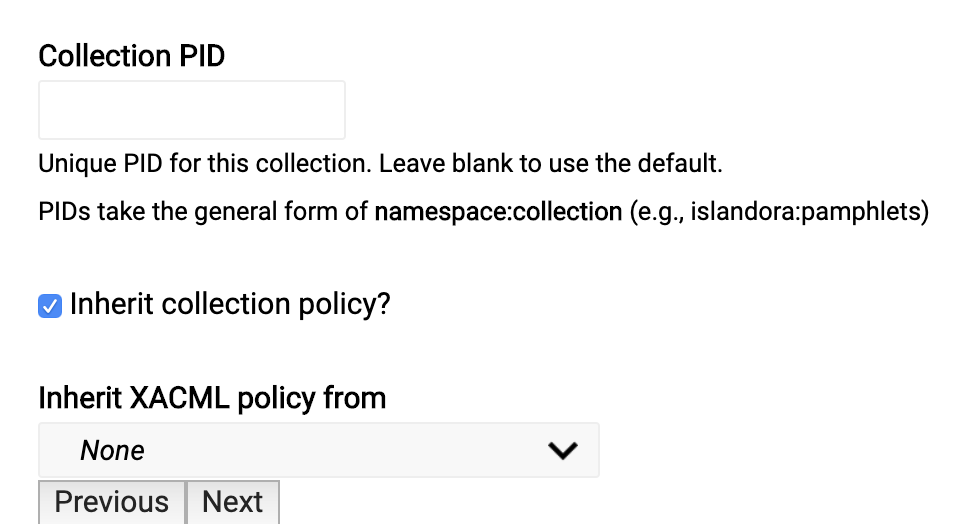
7. Uncheck the box and you will see a list of Namespaces and Content Models to include in your collection. Select your institution's namespace and choose the content models that you will need to ingest content into your collection.
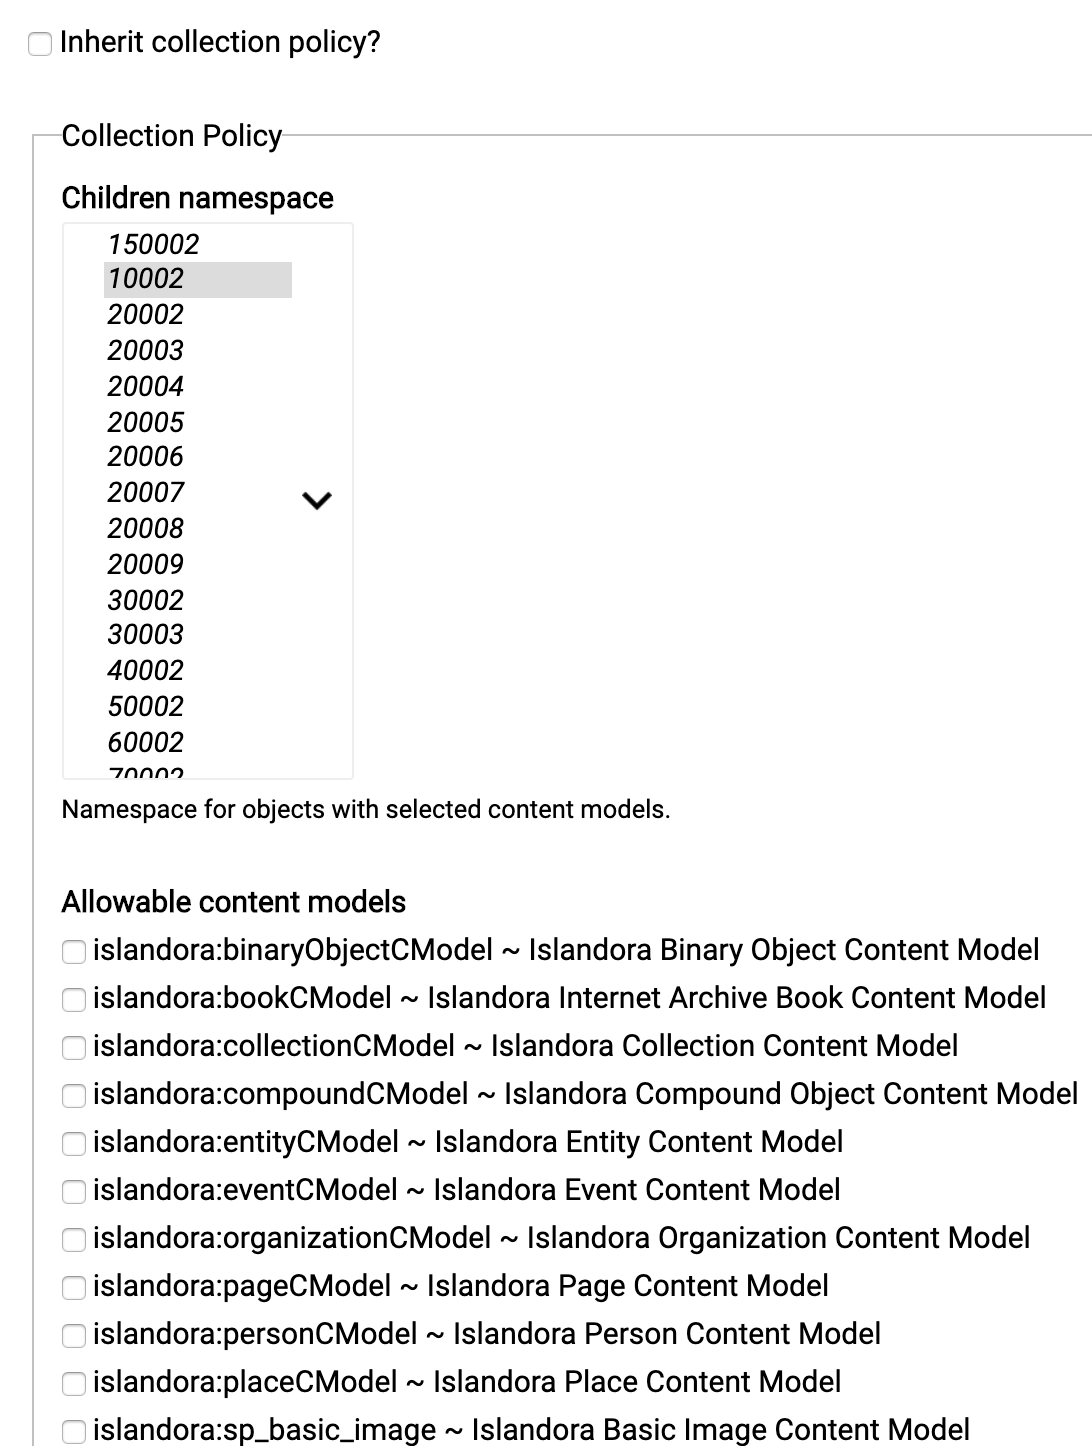

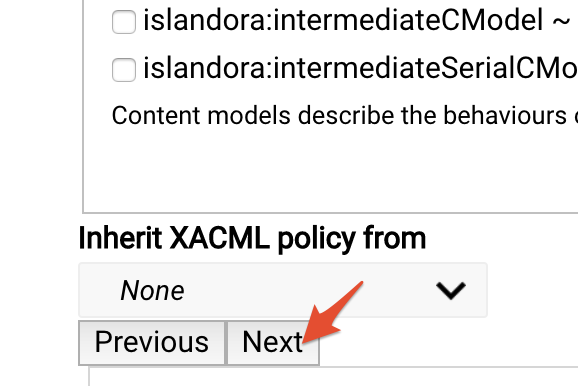
8. After selecting the content models, scroll down and click "Next".
| Info |
|---|
NamespaceA namespace is a series of 5 digits the CTDA uses to identify an institution. All institutions should have received a namespace from the CTDA prior to adding content to the repository. If you are unsure of your namespace, please consult the namespace listings here. |
| Info |
|---|
What is a PID?The PID is an internal unique and persistent identifier assigned by Fedora to digital objects. |
| Info |
|---|
Content ModelsTo learn more about content models, see the Content Model Guide. |
| Tip |
|---|
Which Content Models Should I Choose?Unsure which content models you should choose from this list? Below is a list of the most commonly added file types and the content models they use. You should choose the content models for the collection based on the types of files you want to add to that collection. Click on the name of the content model to learn more specifics about the model. |
Content Model | File Format |
|---|---|
WAV, mp3 | |
gif, png, jpg, jpeg | |
Any file format | |
tiff, jp2 | |
tiff, tif, jp2 | |
tiff, jp2 | |
mp4 |
| Tip |
|---|
| Info |
|---|
The CTDA MODS FormTo learn more about about MODS and CTDA, visit the Describing Your Objects Guide. |
9. Select the MODS form you wish to use.
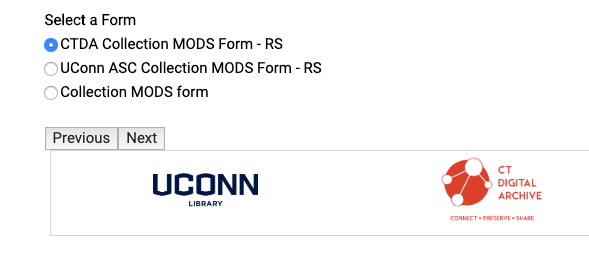
Info title Choosing your MODS form Please select the correct MODS form you wish to use, as the different forms have defaults built into them. Most CTDA users, including users managed by Bibliomation, should use the CTDA Collection MODS Form - RS or the CTDA Item MODS Form - RS. Users from University of Connecticut and the Connecticut State Library should select the appropriate MODS form for their object.
10. For a collection level object, which is what you are currently setting up, you will need to fill out the title of your collection.

11. Scroll down the form to "Digital Origin" and either leave "reformatted digital" (which is the setting for most institutions) or enter "born digital". You can leave "reformatted digital" if your object was digitized from a physical format. You can enter "born digital" if your object was created digitally.

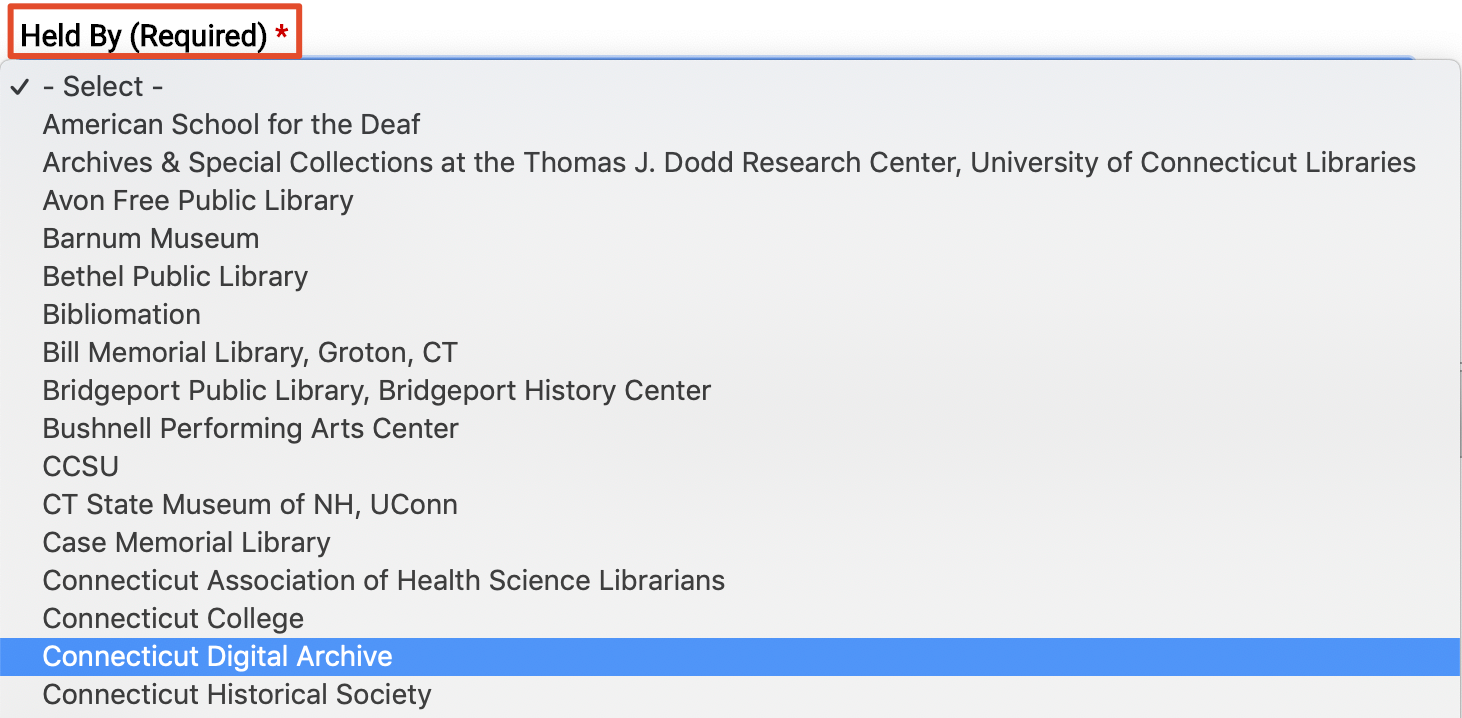
12. Under "Held By" select your institution from the dropdown menu.

| Warning |
|---|
Institution Does Not Appear in DropdownIf your institution does not appear in the dropdown menu under "Held By", please contact CTDA at ctda@uconn.edu to inform us that your institution is missing. |
13. Scroll down to "Rights" and either select the name of your institution or select "Creative Commons NC-BY".
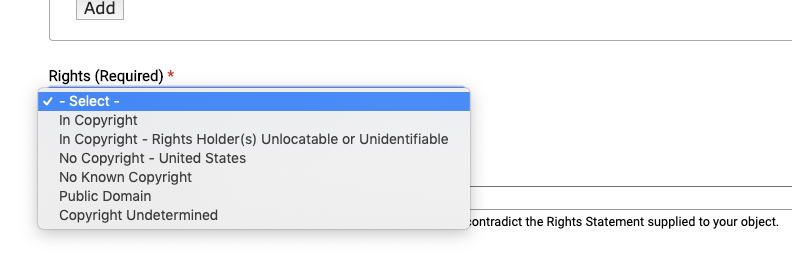
Info title Standardized Rights Statements To learn more about standardized rights statements in the CTDA, please visit the Standardized Rights Statement Guide.
14. Finally, click "Ingest" and you are ready to add content to your collection.

Adding Objects to Your Collection
Now that you have a collection set up, you can start ingesting your content into CTDA.
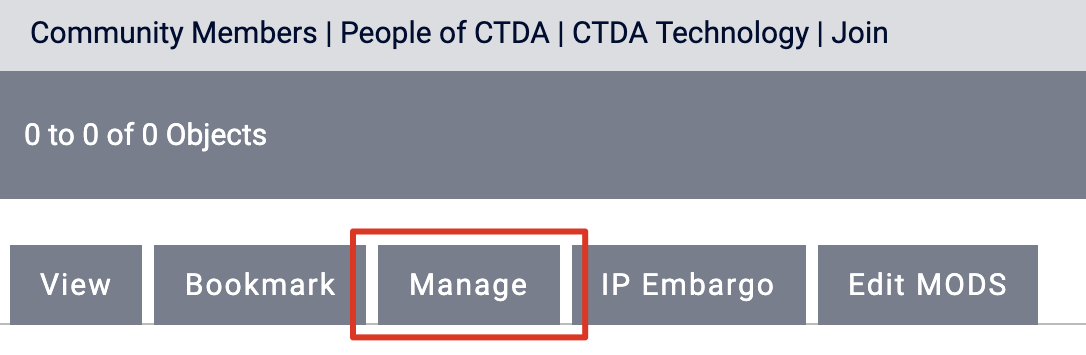
1. On the page of the collection, click the "Manage" tab.

2. Select "Add an object to this Collection".
3. Select the Content Model for the object you wish to ingest from the dropdown menu and click next.

Info To learn more about Content Models, see the Working with Content Models Guide.
4. Select the MODS form you wish to use.
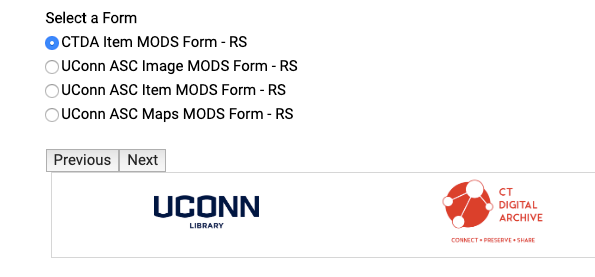
Info title Choosing your MODS form Please select the correct MODS form you wish to use, as the different forms have defaults built into them. Most CTDA users, including users managed by Bibliomation, should use the CTDA Collection MODS Form - RS or the CTDA Item MODS Form - RS. Users from University of Connecticut and the Connecticut State Library should select the appropriate MODS form for their object.
5. The first required field you need to populate is the title of your object.
Note Depending on your institution, your MODS form may have slight differences than this example.

6. The next required field is the "Resource Type" of your object. Choose one from the dropdown menu.

7. The third required field in the form is "Digital Origin". You can leave "reformatted digital" if your object was digitized from a physical format. You can enter "born digital" if your object was created digitally.

8. The fourth required field is the "Held By" field. Select your institution from the dropdown menu
9. The final required field is the "Rights" field. Choose from one of the six standardized rights statements available.
Info title Standardized Rights Statements To learn more about standardized rights statements in the CTDA, please visit the Standardized Rights Statement Guide.
10. Click "Next" and the next page is where you will upload your object. In this example we are uploading an image.
Info title CTDA MODS Form Although the CTDA MODS Form has four required fields explained above, you should try to be as thorough as possible and fill out as many fields as you can when describing your object.
11. Click, "Choose file" and navigate to the file you wish to ingest into the repository.

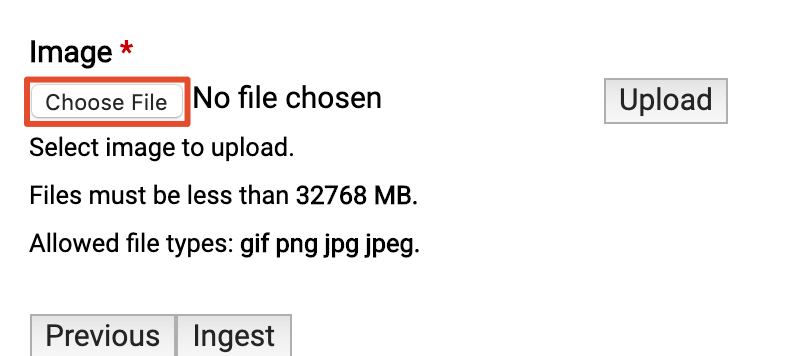
12. Once you have chosen your file, click "Upload".


Note Depending on the file size, the upload can take a few moments to a few minutes. Do not click "Back" or "Refresh" while the upload is taking place.
13. Finally, click ingest.
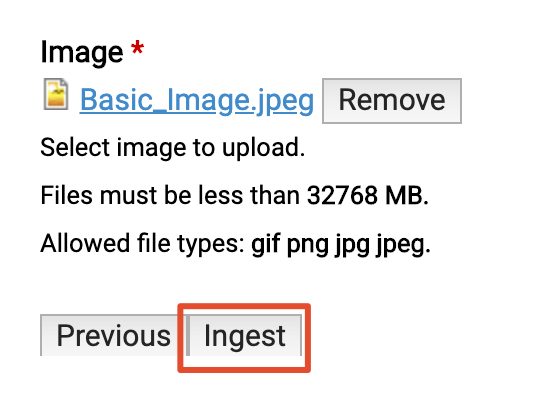

Note Depending on the file size, the upload can take a few moments to a few minutes. Do not click "Back" or "Refresh" while the upload is taking place.
14. Once your file is processed, you will be taken to the object landing page and receive a confirmation message.


| Info |
|---|
Content ModelsTo learn more about managing your objects, see the Datastream Guide. |
Deleting Objects from Your Collection
Navigate to the collection containing the item you want to delete.
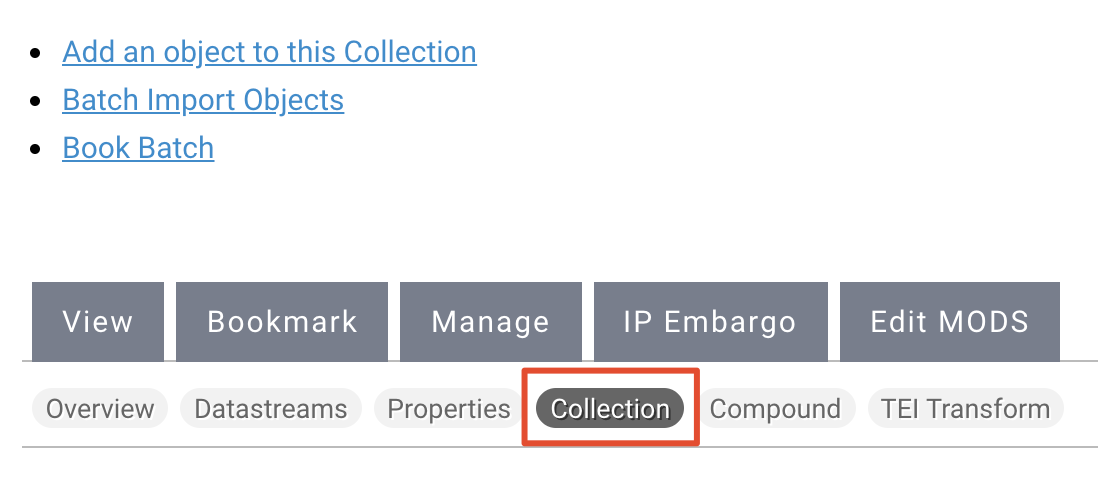
Click the "Manage" tab.
Click the "Collection" button.
Scroll down to "Delete members of this collection".

Choose the object you want to delete by clicking the check box next to name of the objects.

Then click "Delete selected objects".
