Use this guide to learn how to add/remove member(s) from a distribution List
...
Via the Desktop Version of Outlook
- Open Outlook and Open the Address Book

- To Narrow the number of items, Choose "All Distribution Lists" on right hand dropdown

- Find your list you wish to edit. Most of of the School of Business distribution lists, begin with "BUSN - " Type "BUSN" in the top left corner, and this will bring you the School of Business lists.
- Double-Click on the list you wish to edit and Click on "Modify Members..."

- Choose Add or Remove depending on which operation you want to perform.

- When complete, click OK on all windows. This may take some time, up to 2 minutes. The list should now be edited.
...
- .
Via the Web Version of Outlook
- Navigate to https://outlook.office.com/ecp and log in.
- Click on "groups" and select the distribution group you wish to add a person to.
 Image Added
 - Navigate to the distribution group you wish to add a user to in the "Distribution groups I own" column. Use the pencil icon to edit a given group.
 Image Added
 - Navigate to "membership" in the windows that pops up.
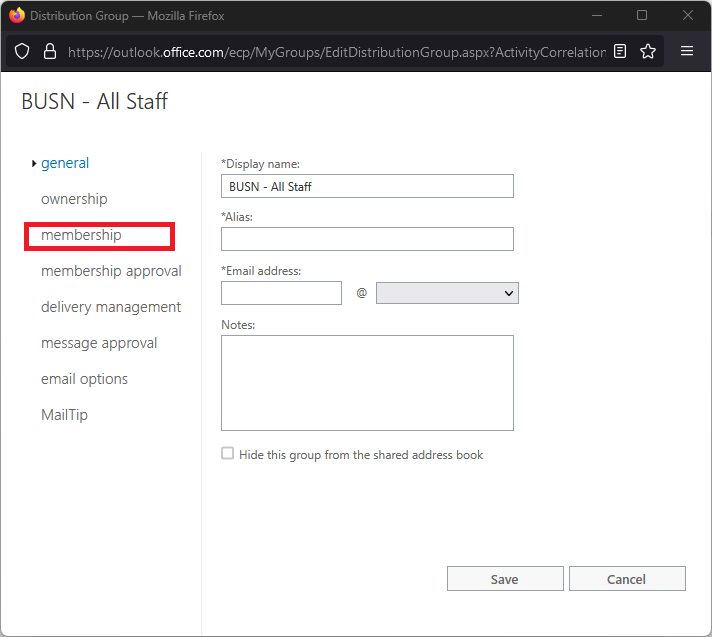 Image Added
 - Add or remove members from the list by selecting the plus or minus icons.
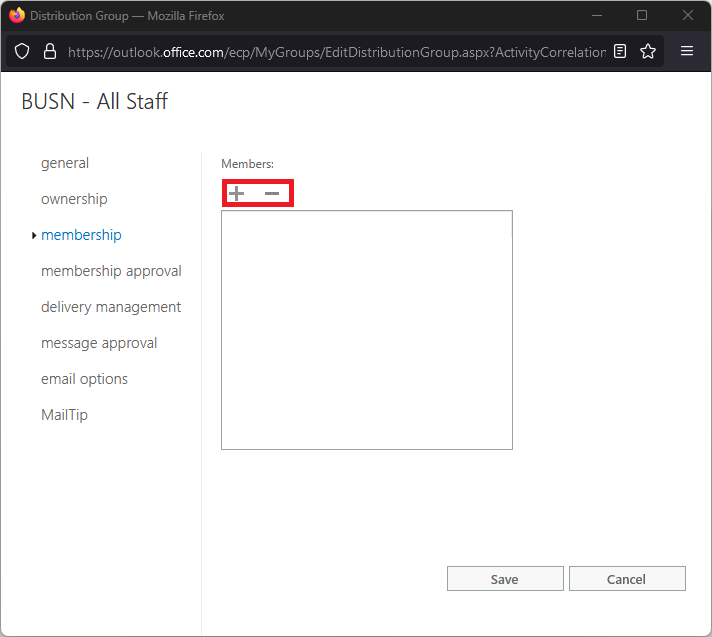 Image Added
- When adding, a "Members" windows will pop up. Enter the name you wish to add and confirm your selection.
- When complete, click Save on all windows. The list should now be edited.
Related articles
| Filter by label (Content by label) |
|---|
| showLabels | false |
|---|
| max | 5 |
|---|
| spaces | BUSNIT |
|---|
| showSpace | false |
|---|
| sort | modified |
|---|
| reverse | true |
|---|
| type | page |
|---|
| cql | label in ( "lists" , "distribution" , "outlook" ) and type = "page" and space = "BUSNIT" |
|---|
| labels | Outlook Distribution Lists |
|---|
|