Configuring Microsoft Outlook 2016 / 2019
Note: These instructions assume you are on campus. If you are off campus please start a VPN session prior to setting up your mail profile. After successfully establishing a mail profile you will not need a VPN session to send and receive mail.
Open Microsoft Outlook
- Find the Outlook application icon in the Windows Start Menu

- Double click on the start menu icon.
- Follow the instructions provided my the Outlook setup wizard.
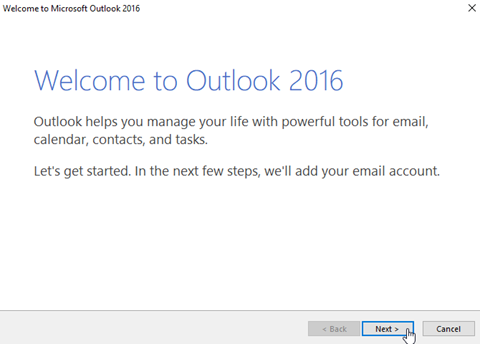
- Click Next>.
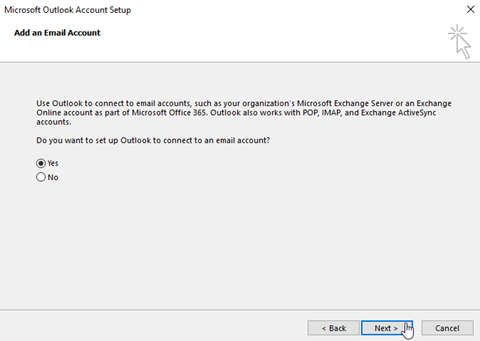
- Verify Yes is selected.
- Click Next>.
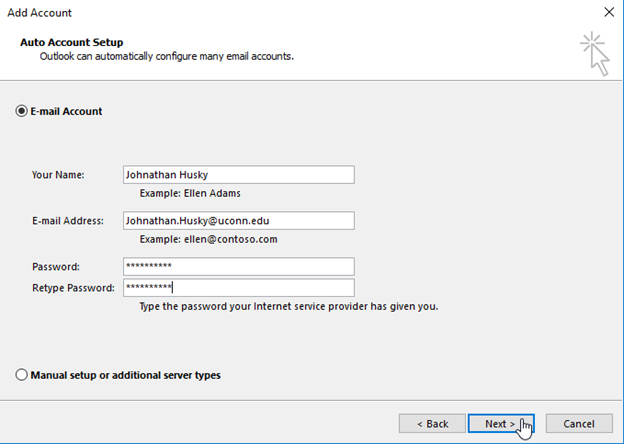
- In the “Your Name:” field enter your first name, add a space, followed by your last name.
- In the “E-mail address:” field enter your “Personal Name” or “Pername” with @uconn.edu appended.
- Pernames can be verified by going to https://pername.uconn.edu/cgi-bin/pn_netid.pl?mode=ppn. For most of the UConn community the pername is firstname.lastname@uconn.edu. E.G. johnathan.husky@uconn.edu.
- In the “Password:” field enter your UConn NetID password.
- In the Retype Password: field enter the NetID password to confirm it.
- Click Next>.
- An additional credentials window will open
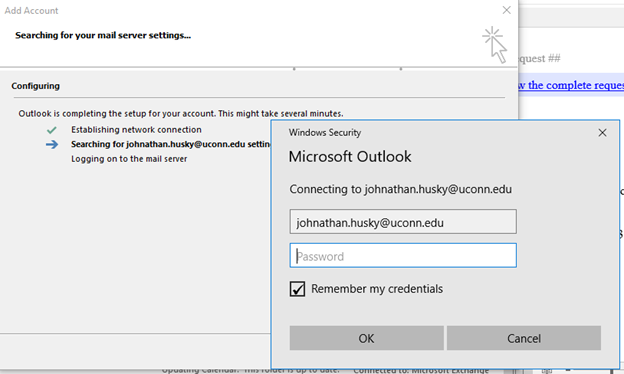
- Confirm the email address is correct and type your NetID password in the password field.
- Place a checkmark in the option to Remember my credentials.
- Click OK.
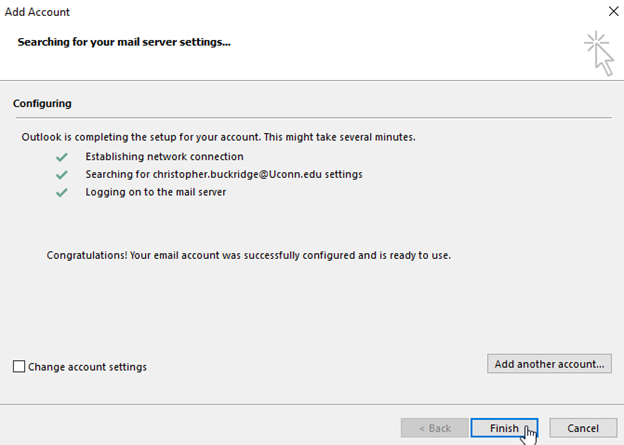
- Click Finish to view your mail.
For more help, please contact our helpdesk at busn.help@uconn.edu