Add voice/audio to PowerPoint
If you present PowerPoint slides in class as part of your class lectures you may want to consider adding voice to deliver content in lieu of classes.
If you have a laptop, web camera, headset or external microphone and PowerPoint you already have the tools needed to add voice to PowerPoint slides.
Choosing the Input device
Connect your sound input device.
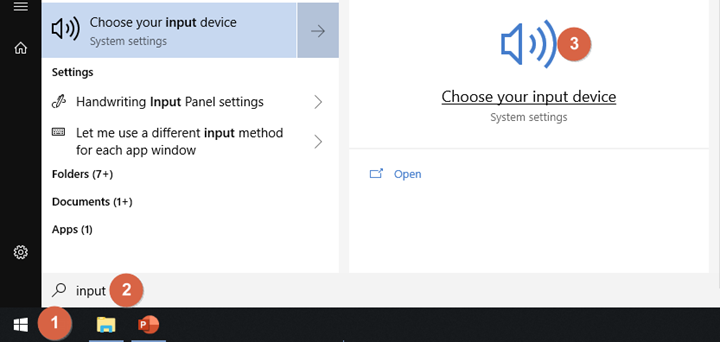
- Click on the Windows Start icon.
- Type “input” the search field.
- Click on the “Choose your input device” icon.
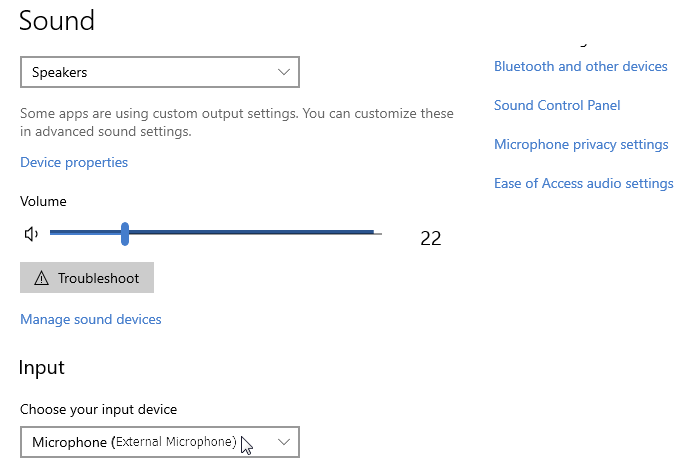
In the “Input” section click in the “Choose your input device” drop-down box and select the appropriate microphone.
Recording Audio
Open the PowerPoint presentation you would like to add voice to.
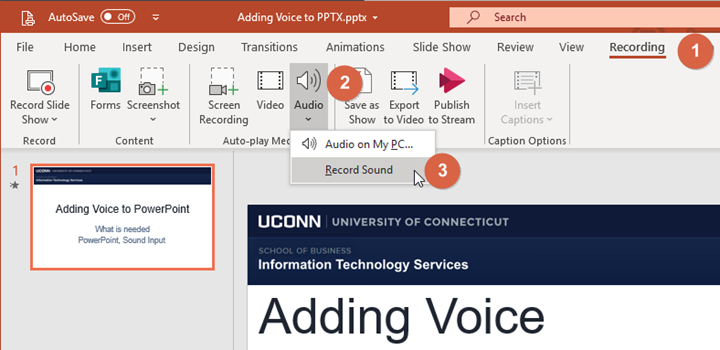
- Click on the “Recording” Tab in PowerPoint.
- Click on Audio icon in the PowerPoint Ribbon Bar.
- Select “Record Sound” from the drop-down menu.
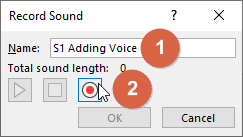
- Name the recording. It is recommended that the slide number and slide title be included in the recording name.”
- Click on the record icon (red circle) to be begin the recording.
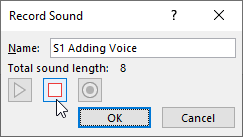
Click on the stop icon (red square) to end the recording.
Click “OK.” to embed the recording.
Listening to Audio

A sound icon will be added to the slide indicating the slide has a sound component.
Click, drag and drop the sound icon anywhere on the slide.
Double click on the sound icon and press the play icon if the embedded sound player to hear the annotation.
Deleting a recording
If a re-recording is needed, click to select the sound icon and press the “Delete” key on your keyboard.
Repeat the recording process until all desired slides have voice added.
Automating voice playback
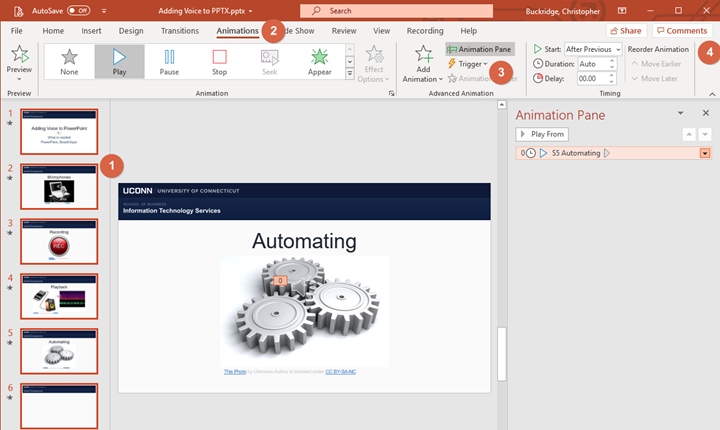
- Click in the Film Strip / Slide Navigation Pane.
- Press CTRL + A to select all slides (a Red highlight box should appear around each slide).
- Click on the Animations tab.
- Click on the Animation Pane icon to display the Animation Pane.
- in the Start: Drop-down box click an option for when the sound annotation should start.
“After Previous” will start a slide’s recording when that slide is opened.
Save the presentation.
Viewing the Presentation
In the View Buttons section (bottom most, right most) click on the Slide Show icon to begin slide show for a test of the slideshow.
To share the presentation, upload it to Sway, or if the presentation is less than 25MB (Gmail attachment size limit) email it.
Large file sharing tools
https://dropbox.uconn.edu/dropbox
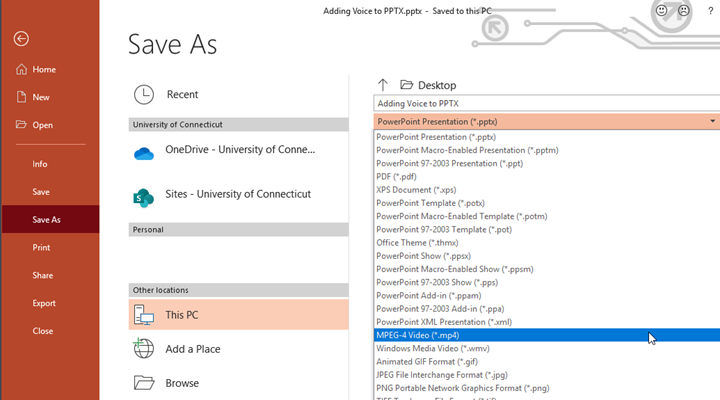
- Save the PowerPoint presentation as a movie file to share it on Kaltura. Open the presentation if it is not already open. Save the file as PPTS first so it can be edited later.
- Click File>Save As>MPEG-4 Video to share it with Kaltura.
Uploading Video Files to Kaltura
For more help, please contact our helpdesk at busn.help@uconn.edu