| Panel | |
|---|---|
|
| |||||||||||||
Adding a Manuscript to the repository is a two step process. First, you must upload a TEI XML file containing a transcription of the manuscript. Secondly, must add images of the pages of the manuscript. You can add a single page at a time or multiple pages at once using batch ingest. |
| Note |
|---|
In order to ingest manuscripts, you need to enable the Content Models in the collection policy of the collection object where the book will reside:
See the Choosing Content Models Guide for information about enabling Content Models. |
| Panel | ||||||||||||||
|---|---|---|---|---|---|---|---|---|---|---|---|---|---|---|
| ||||||||||||||
|
| Tip |
|---|
Manuscript Content Model Supported File Formats
|
Adding a Manuscript
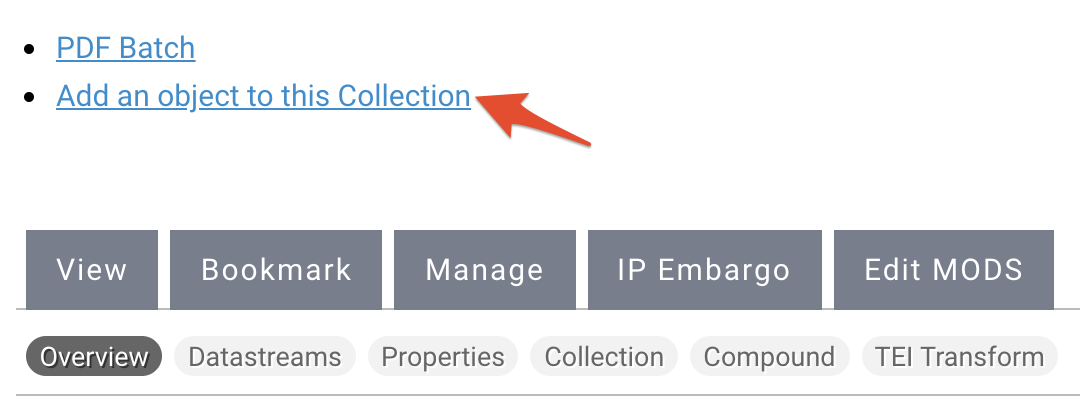
Navigate to the collection you wish to add the manuscript to.
Click the "Manage" tab.


Select "Add an object to this Collection".

Select "Manuscript Content Model" from the "Select a Content Model to Ingest" dropdown menu and click "Next".

Info If you do not see the content model you are looking for, it may not be a part of your collection policy. You can add a content model to your collection policy by following the steps in this guide.
Select the MODS form you wish to use.
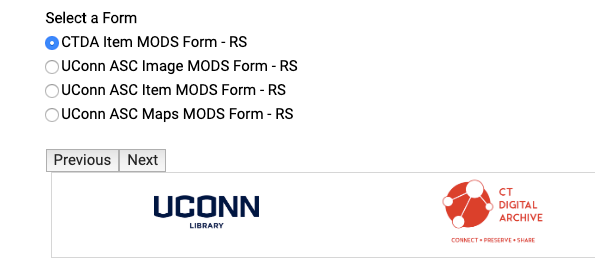
Info title Choosing your MODS form Please select the correct MODS form you wish to use, as the different forms have defaults built into them. Most CTDA users, including users managed by Bibliomation, should use the CTDA Collection MODS Form or the CTDA Item MODS form. Users from University of Connecticut and the Connecticut State Library should select the appropriate MODS form for their object.
If you have a finding aid previously added to the repository associated with the manuscript you are adding, type in the name of the finding aid and select the correct title from the autofill list and click the "Next" button.

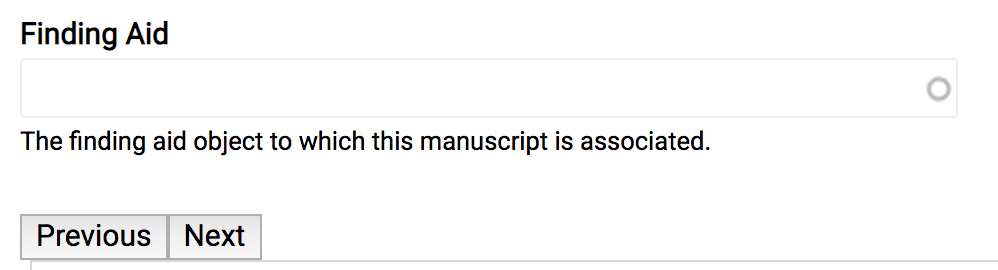
If you do not have a finding aid associated with the manuscript, leave the field blank click the "Next" button.
You will be taken to the CTDA MODS form. To learn more about the form, see the CTDA MODS Form Guide. The CTDA MODS Form has five required fields that you need to fill out. But you should try to be a thorough as possible and fill out as many fields as you can when describing your object.

The first required field you need to populate is the title of your image.

The next required field is the "Resource Type", which should be "mixed material" because you are uploading the text of the manuscript in an XML file and images of the manuscript pages.


The third required field in the form is "Digital Origin". You should leave "reformatted digital" in this field for the page images you will be uploading.

Next to the text box containing "reformatted digital", click
 and type into the field "born digital" for the XML text file you will be uploading. Click again to add the term.


The fourth required field is the "Held By" field. Select your institution from the dropdown menu.

Warning title Institution Does Not Appear in Dropdown If your institution does not appear in the dropdown menu under "Held By" please contact CTDA at ctda@uconn.edu to inform us that your institution is missing.
The final required field is the "Rights" field. Choose your institution from the dropdown menu. If you do not have a customized rights statement, select "Creative Commons NC-BY".


Info title Rights Statements The default rights statement is set to the Creative Commons NC-BY 4.0 which states: "This work is licensed under a Creative Commons Attribution-NonCommercial 4.0 International License, CC BY-NC." To learn more about Creative Commons licenses, visit https://creativecommons.org/.
If you have a custom rights statement, please send the text to us at ctda@uconn.edu.
Once you have entered all of your metadata into the form, scroll to the bottom of the page and click the "Next" button.
Adding the TEI XML file
On this page you will upload your text XML file. Select "Choose file" and locate the XML file you want to upload. When you have located the file click the "Upload" button.
Note Depending on the file size, the upload can take a few moments to a few minutes. Do not click "Back" or "Refresh" while the upload is taking place.
Next click the "Ingest" button.
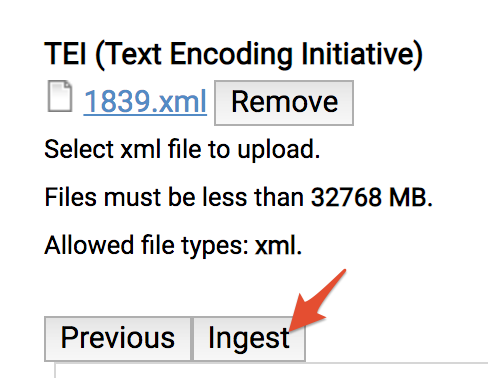

Note Depending on the file size, the ingest can take a few moments to a few minutes. Do not click "Back" or "Refresh" while the ingest is taking place.
After the file has been ingested, you will see a transcript of your manuscript.


Adding Page Images
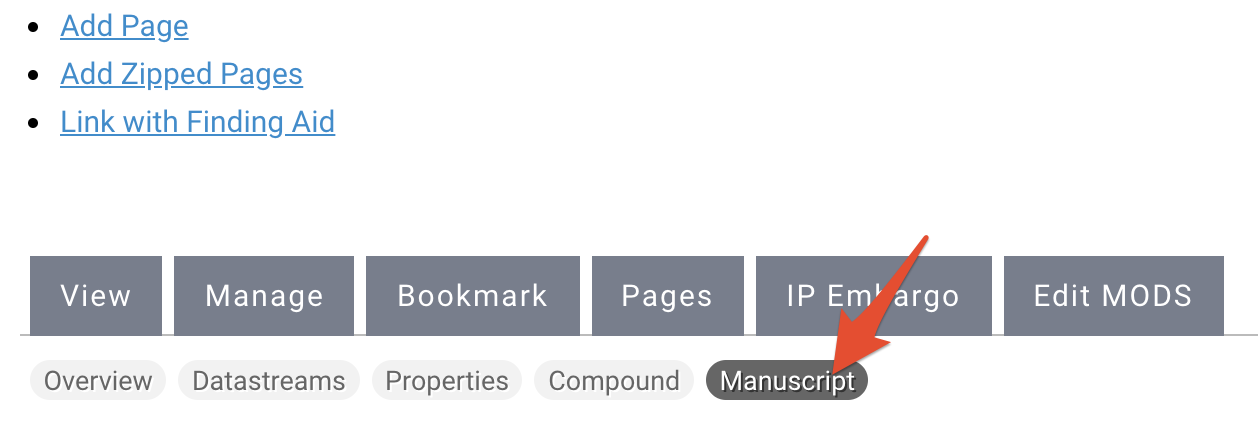
While you are on the page displaying the transcript for you manuscript, click the "Manage" tab.


Then click on "Manuscript".

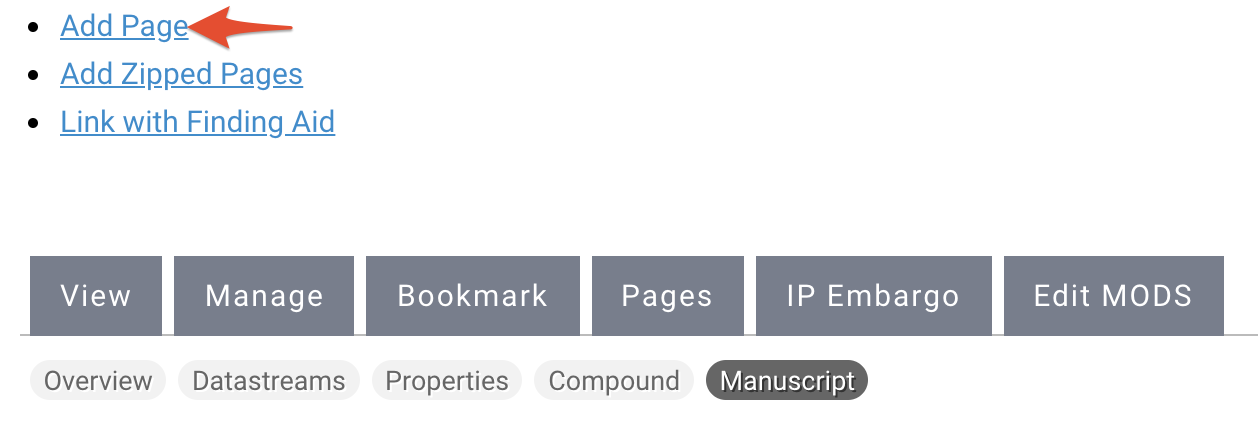
Next click "Add Page".

Select "Choose file" and locate the image file you want to upload. When you have located the file click the "Upload" button.
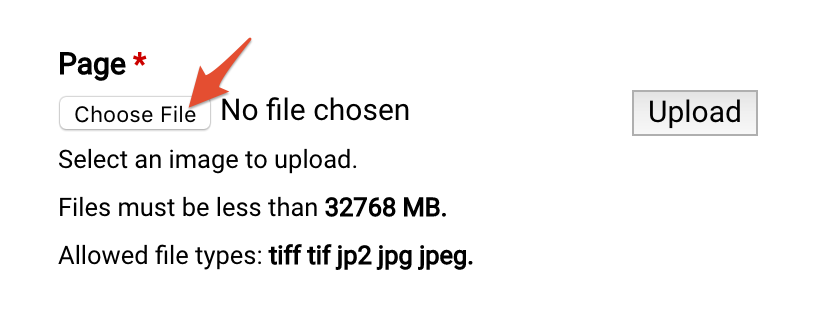

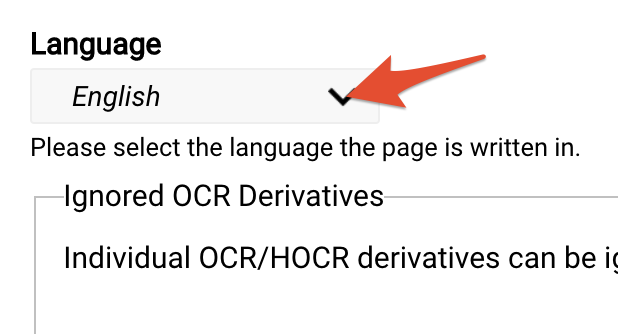
Then select the "Language" of the text on the page image you are uploading.

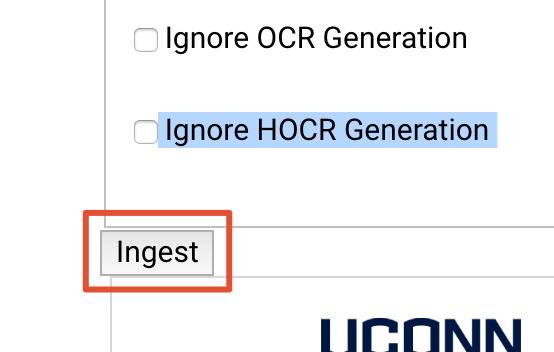
Next, you may choose whether or not the page will be included in OCR/HOCR (optical character recognition). You can opt out by checking one or both of the boxes.


Next click the "Ingest" button.

Once the image is finished processing, click the title of your manuscript in the breadcrumb trail at the top of the page.
You will be brought to the manuscript object page where you can view the transcript you ingested in the XML file and the image of the page on the same screen.
Datastreams for Manuscript Objects
ID | Label |
|---|---|
RELS-EXT | Fedora Object to Object Relationship Metadata |
MODS | MODS metadata record, created at time of ingest |
DC | Dublin Core metadata record, created at time of ingest |
TEI | |
TN | Thumbnail image, created at time of ingest |
| Info | |
|---|---|
| title | DatastreamsTo lean more about Datastreams, visit the Datastream Guide. |
Video Guide: Manuscript Content Model Video Tutorial
| Tip |
|---|
Coming soon! |