...
Click on File.

Click Account Settings.

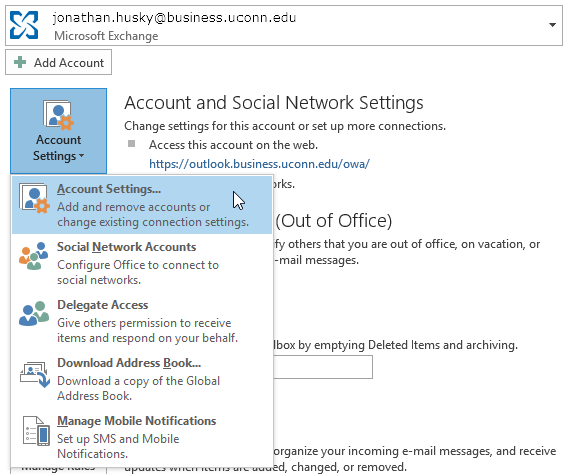
Choose on Account Settings...
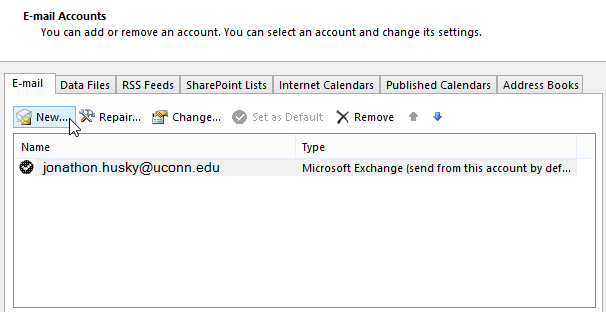
Click New...


Select “Manual setup or additional server types”
Click Next.


Select “POP or IMAP.”
Click Next.
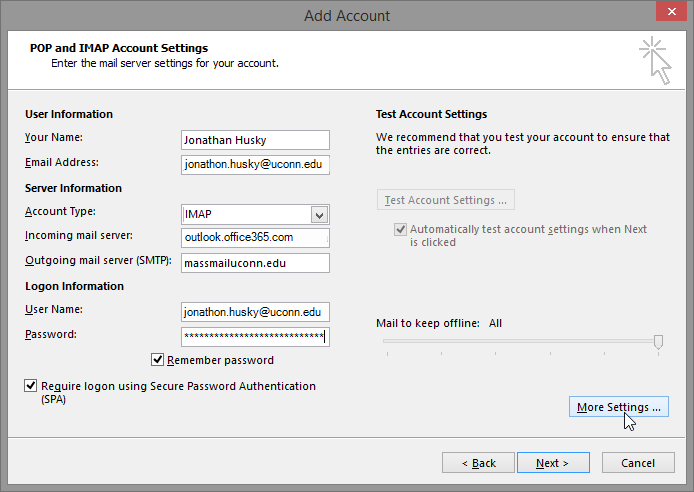
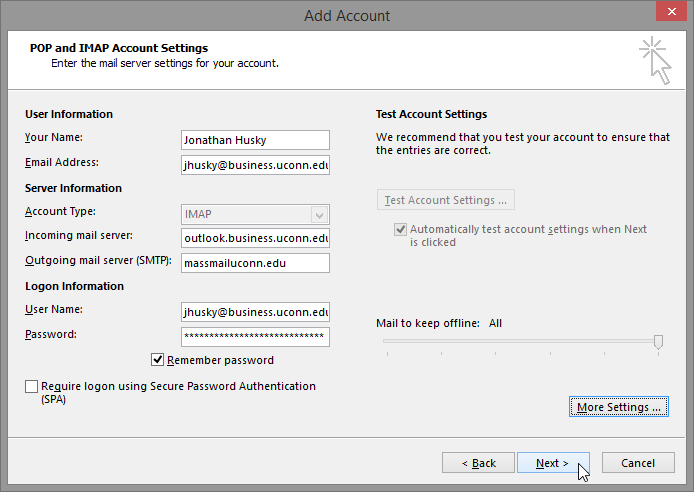
Enter your name in the Your Name Field.
Enter your School of Business email address in the Email Address field.
...
In the Incoming mail server field enter either ‘mail.business.uconn.edu’ or ‘outlook.businessoffice365.uconn.educom'
In the Outgoing mail server (SMTP) field enter ‘massmail.uconn.edu’
Enter your office 365 logon information in the Logon Information field. Check both boxes.
Click More Settings... 
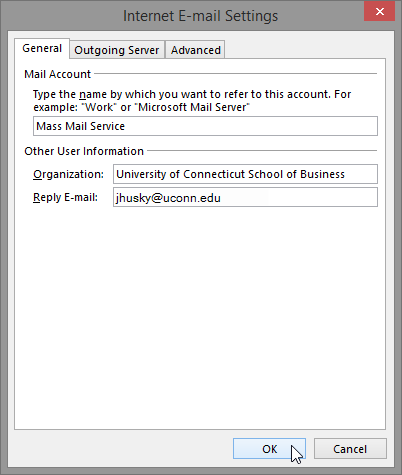
Name the mail account Mass Mail Service.
...
Return to the Add account window.

 Click Next>.
Account settings will be tested
...
Note the newly created ‘Mass Mail Service’

Click Close.
Return Outlook.
...
| Filter by label (Content by label) | ||||||||||||||||||||
|---|---|---|---|---|---|---|---|---|---|---|---|---|---|---|---|---|---|---|---|---|
|
| Page Properties | ||
|---|---|---|
| ||
|
...